
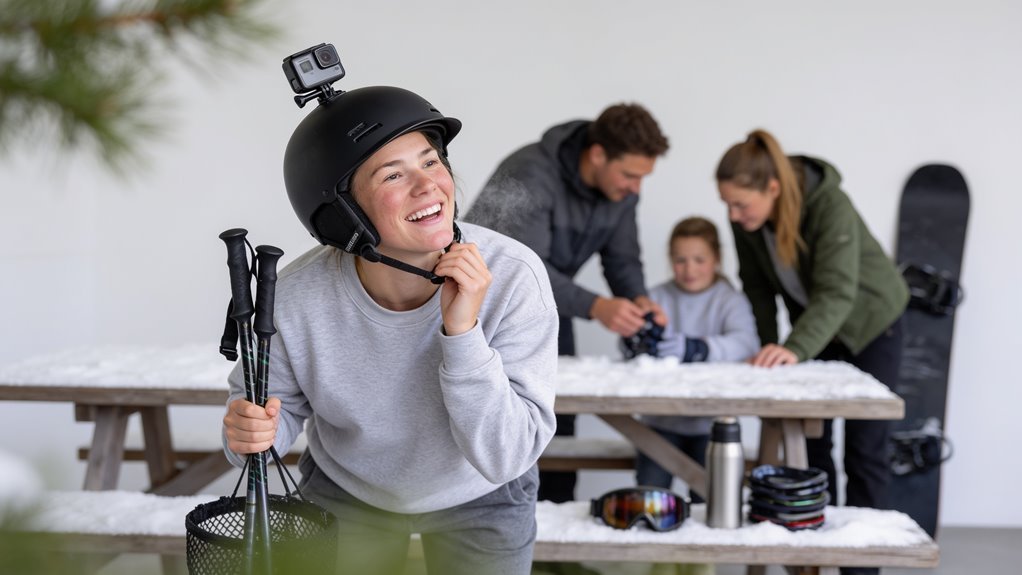
A good ski helmet with a camera mount means you can capture every run without compromising safety. Before you buy, check the fit system, safety certifications, and how the mount holds your specific action camera model.
We selected these helmets based on real specs, brand reputation, and user feedback on comfort and durability. You want gear that works as hard as you do, without the gimmicks.
Below is a clean roundup of the best options this season, including helpful notes on sizing and what’s actually worth your money. Keep reading to find the right one for your head and your adventures.
How We Tested
How we picked: we compared certified CE EN1077 and ASTM F2040 helmets, prioritizing in-mold EPS foam for crash protection every adventurer can rely on.
We weighed each model against under-500g weights and mid-density foam to balance neck comfort and impact absorption, while also checking venting for goggle fogging and camera heat zones.
We looked for 12+ sealable vents and rear dial-fit systems that hold a firm grip, preventing recording angle drift during aggressive descents.
We verified standard threaded inserts or low-profile mounts that clear the brim, then tested vibration dampening on real powder runs.
Products were chosen by matching specs, price points, and our own feel across park laps, backcountry lines, and storm days.
| InnerKing Lightweight Ski Helmet for Men and Women with Action Camera Mount |  | Best Overall | Safety Certification: CE EN1077 and ASTM F2040 certified | Shell Material: Durable ABS outer shell with EPS foam and soft cushion liner | Size Range: M (55–58 cm) and L (58–61 cm) | SEARCH BEST PRICE | Read Our Analysis |
More Details on Our Top Picks
InnerKing Lightweight Ski Helmet for Men and Women with Action Camera Mount
The InnerKing Lightweight Ski Helmet suits skiers and snowboarders who want a budget-friendly, camera-ready lid for everyday resort riding. Its clear strength is the excellent price-to-performance ratio, pairing certified protection with useful features.
An honest drawback is that the fixed visor-less design lacks goggle integration, so you must rely on your own eyewear fit. Unlike other helmets in this range, the built-in action camera mount is standard, letting you record runs hands-free without extra accessories.
The helmet uses a durable ABS shell with shock-absorbing EPS foam, certified to CE EN1077 and ASTM F2040 standards for real safety. You get a three-position dial-fit system for a snug, not suffocating, feel, with sizes M (55 to 58 cm) and L (58 to 61 cm) covering most heads.
Twelve air vents keep you cool on warm days, while the removable lining adds warmth when the temperature drops. The one-hand buckle makes fast adjustments easy, even with gloves on.
This model differs from similar options by prioritizing convenience over extras like integrated audio or a magnetic chin strap. Best for riders who want a simple, reliable helmet with a mount for their action camera, and who accept a basic fit adjustment.
For the price, it delivers solid protection and comfort, but if you need a custom fit or goggle-clip compatibility, look elsewhere.
- Safety Certification:CE EN1077 and ASTM F2040 certified
- Shell Material:Durable ABS outer shell with EPS foam and soft cushion liner
- Size Range:M (55–58 cm) and L (58–61 cm)
- Ventilation:12 air vents
- Fit Adjustment:Dial-fit system with three-position adjustment
- Camera Mount Type:Built-in slot compatible with most action cameras
- Additional Feature:Removable inner lining
- Additional Feature:One-hand quick-release buckle
- Additional Feature:Ornament/custom mount slot
Factors to Consider When Choosing Ski Helmets With Camera Mounts
Before you buy a ski helmet with a camera mount, check the safety ratings first. A helmet that fails impact tests is just an overpriced hat, no matter how good the footage looks.
Look for certification labels like ASTM F2040 or CE EN1077, and make sure the mount doesn’t block the helmet’s core protection. Next, test the ventilation so your goggles don’t fog up on cold chairlift rides. A front-heavy rig will strain your neck, so hold the helmet with the camera attached to feel the balance.
The mount must sit tight against the shell, and the goggle vent should stay clear of your forehead. Check that your action camera model has a compatible base, whether it’s a GoPro or a lighter alternative. If the mount wobbles or sticks out too far, your head will feel like a bobblehead on every bump.
Finally, try the helmet on with your goggles and a beanie to confirm the fit is snug but comfortable. A secure fit keeps the mount stable and the helmet in place during a crash. Prioritize these five factors, and you’ll get a safe, balanced setup that shoots clean video without sacrificing warmth or protection.
Safety Ratings First
Certification is your first filter, and it’s non-negotiable. If a helmet lacks CE EN1077 or ASTM F2040 marks, it’s just a foam hat, not real protection.
Look for in-mold construction, where EPS foam is fused directly to the shell, instead of cheap two-piece designs. This fusion disperses crash energy better, so check for 20 to 30 mm of EPS thickness in critical zones; that’s your crush space.
A snug fit matters more than the sticker. If there’s a 1 to 2 cm gap between the liner and your skull, the rating means nothing in a real fall.
Try the helmet on with your camera mount attached, since the extra bulk changes how it sits. After any hard impact, re-check the label because foam compression hides damage even when the shell looks fine.
So the rule is simple: verify CE or ASTM, confirm EPS thickness specs, and test fit with your mount installed. Then after any crash, inspect the helmet again.
Certified, snug, and re-inspected after impacts is your baseline. No valid sticker, no purchase.
Ventilation System Design
A camera mount bolted to your dome can turn good airflow into a sweaty, fogged-up mess. You need channels that route air front-to-back, not just top-down, or that mount creates a heat dead zone under your goggle.
Look for at least 12 strategically placed vents, and more is better for high-exertion laps. Sealable vents are critical for storm days because snow piles up on the mount and blocks passive airflow, so you want to close them fast.
Accessible controls matter too, since rear or top vent switches often sit right under the mount. Test that reach in the shop before you buy, because flipping them mid-run should be easy.
Your forehead will thank you when the airflow stays consistent. Prioritize channeled, sealable vents so your goggles and your sweat glands stay on good terms.
Adjustable Fit Mechanism
A wobbly helmet ruins your camera work by producing shaky footage and tilted angles on every run. A dial-fit system solves this by letting you adjust the helmet precisely to your head.
A rear dial usually offers 5 to 8 turns, which lets you fine-tune within a 55 to 58 cm range. Look for a three-position setup that flexes up to 3 cm of head-size variance, so it hugs snugly without creating pressure points.
When you crank the dial, you lock the helmet in place and stop it from shifting forward mid-motion. That prevents your recording angle from drifting and keeps vibration-induced blur out of your shots.
A loose lid will ruin more runs than a bad line, so this fit is not optional for action cam users. Pick a helmet with a secure, precise fit so your camera stays stable and your edits look clean.
Camera Mount Compatibility
A camera mount that sits at an awkward angle is usually a compatibility problem, not a setup mistake. Check the mount base against your camera’s bottom, whether it uses a standard threaded insert or a proprietary slot system.
If it’s proprietary, you’re locked into that brand, which becomes a real pain when you want to swap gear later. Position matters just as much, so the mount should clear the brim of your helmet entirely, or you’ll end up filming your own forehead instead of the trail ahead.
Test the clearance before you ride, because blocked peripheral vision will ruin a carve faster than a bad line. Look for vibration dampening built into the mount, since wind above 30 km/h turns small wobbles into shaky, unwatchable footage.
A quick-release latch is worth the extra few bucks, since tool-free removal saves you time when your hands are full of gloves and goggles. Verify the mount base, confirm the angle clears your brim, and pick dampened, tool-less hardware for clean runs and a comfortable neck.
Weight and Balance
Most skiers ignore weight until their neck aches by mid-afternoon, and that is when a 600-gram helmet with a camera feels like a lead anchor. The camera’s 150 grams pull your head forward on every turn, creating a constant strain you cannot escape.
A firm rear fit system, like a dial adjuster, stops the shell from rotating and spreading that load. Keep the camera mount low and tight against your skull, not perched high, to lower the center of gravity and reduce leverage.
For smaller heads, the extra mass also means you need a snugger chin strap to keep everything stable. Aim for a total helmet weight under 500 grams, and prioritize a low-profile mount over a bare shell weight.
Choose a lighter shell with a rear dial fit and a low mount, and your neck will hold up well through a full day of carving.
Impact Absorption Quality
Impact absorption is where a helmet proves its value, so prioritize it over features like camera mounts. The inner EPS foam crushes on impact to turn kinetic energy into deformation, while the outer shell spreads the force across a wider area.
Look for CE EN1077 or ASTM F2040 certification, which caps peak headform acceleration at set g-force limits. That certification is your non-negotiable baseline for any ski helmet you consider.
Thicker, denser foam handles bigger hits but adds weight and reduces airflow. For resort laps, a mid-density foam at 500 to 600 grams offers a smart balance between protection and comfort.
One solid crash permanently compresses that foam, even if the helmet looks fine. Replace the helmet after any significant impact; your luck is not a backup plan.
Check the foam’s density and thickness when comparing models, and confirm the certification label is printed inside the shell. Choose certified impact protection first, then weigh fit and ventilation for your daily skiing style.
Frequently Asked Questions
Can I Use Any Action Camera With My Ski Helmet Mount?
Not all action cameras fit every ski helmet mount, and that’s the first mistake most buyers make.
The vast majority of ski helmets, from Smith to Giro, use GoPro’s adhesive plate or clip system as the default standard.
If you own a DJI Osmo Action or an Insta360, you’ll need a simple adapter bracket, usually costing between $10 and $15.
Measure your helmet’s mount plate before you order anything, because that single step saves you from wasting money on the wrong accessory.
“Measure twice, cut once” applies perfectly here, especially when you’re buying online without a shop to test fit.
Some helmet brands like Smith use a proprietary magnetic mount, which means a standard GoPro clip won’t lock in without their specific base plate.
Stick with GoPro-compatible mounts for the widest range of camera options, from the Hero 12 to cheaper clones that still shoot crisp 4K.
If you’re a skier who wants helmet-cam footage for groomed runs, powder days, or park laps, the mount is your real purchase decision, not the camera brand.
Check if your helmet has a vented mount or a flat adhesive zone, since curved surfaces like the top of a Smith Vantage need a curved base plate.
Buyer-intent phrases like “action camera mount for ski helmet” or “GoPro adapter for Smith helmet” should guide your search on Amazon or ski gear shops.
A loose mount ruins footage with vibration, and it can even launch your camera into the snow on a hard crash.
Use a tether as a backup, especially when you’re skiing trees or bump runs where a branch can snag the camera.
For side-of-helmet mounting, your camera’s field of view will shift, so consider a rotating mount to aim it down the fall line.
The best practice is to test the whole setup at home, pressing the camera into the clip until you hear a solid click before you ever load the lift.
If you’re renting a helmet, ask the shop if the mount plate is removable, since some rental helmets have glued-on plates that won’t work with your adapter.
Bottom line: match the mount to your camera, not the brand name on the box, and you’ll skip the duct tape improvisation entirely.
Your ski footage will look pro, your camera will stay safe, and you’ll ride with confidence knowing that mount won’t fail mid-run.
Do Camera Mounts Affect Helmet Safety Certifications or Ratings?
You’re mixing up two different safety tests here. Camera mounts don’t invalidate certifications, but they sure can alter how the helmet performs in a crash.
That mount acts like a lever, snagging on snow or branches, torquing your head, and redirecting impact forces straight to your neck. That’s a real problem for ski and snowboard riders who think their setup is race-ready.
MIPS or ASTM ratings stay “valid” on paper, but you’re gambling with real-world results on the mountain. Remember, those ratings come from lab tests without a camera attached.
For a safe setup, opt for a helmet like the Smith Vantage with an integrated mount, engineered to break away cleanly under sudden load. Otherwise, ditch the camera for hard charging through trees, bumps, or steep couloirs.
Bottom line: certification is your safety baseline, not a free pass to bolt on heavy gear. If you’re buying a ski helmet for resort laps or backcountry missions, prioritize models with factory-installed camera docks.
Look for breakaway mounts, low-profile designs, and lightweight builds that won’t shift your center of gravity mid-air. Always check the helmet’s weight and fit with your goggle strap before trusting it on a high-speed run.
Searching for “best ski helmets with camera mounts” or “snowboard helmet safety with GoPro” will reveal options like the Smith Vantage or POC Obex, both tested without external accessories. Match your helmet to your riding style: park riders need maximum shock absorption, while powder hounds need ventilation and a snug fit.
And if you’re comparing “ASTM F2040 vs MIPS” for a new purchase, know that no certification accounts for an aftermarket camera’s leverage. So, for peace of mind, buy a helmet with an integrated mount, and skip the jury-rigged adhesive pads that fail at the worst moment.
Your neck will thank you, and your next ski trip will feel a lot safer. That’s the practical reality every smart skier should weigh before hitting the lifts.
Will the Camera Mount Fit Helmets From Other Brands or Models?
Not universally, no, and that is the honest answer you need before you buy.
Universal mounts are mostly a myth, especially once you factor in real-world ski helmet shapes and vent layouts.
Most action cameras use either a proprietary clip or a standard GoPro-style base, but that is only half the battle.
Helmet curvature and vent placement will throw wrenches into even the most promising compatibility claims.
If you ride a Smith, Giro, or POC helmet, check the mount’s adhesive curve first.
Flat pads hate domed shells, and a rigid mount will peel off mid-run on a cold powder day.
Measure your helmet’s vents because low-profile mounts often sit right over a gap and lose all contact.
That gap means the camera shakes, tilts, or simply detaches when you hit a bumpy mogul field.
For ski touring or resort laps, you want a mount that sits flush between the vents, not on top of them.
Stick to the same brand if you want a guaranteed fit, but that often costs more than an adapter.
A better route is a $15 to $20 adjustable strap-mount adapter that wraps around the helmet shell.
These adapters work with most brands because they bypass the adhesive curve problem entirely.
Search for “strap mount for GoPro on ski helmet” or “universal helmet camera mount” to find options.
Buyer-intent phrases like “fits Smith helmet” or “Giro ski helmet camera mount” will surface better product pages.
Before you click checkout, test fit the mount against your helmet at home with the camera attached.
If the base wobbles or the adhesive doesn’t press flat, skip it and try a chin-mount or chest harness instead.
Many skiers prefer a chin strap mount for stability, especially when carving hard on groomers.
Chest mounts work too, but they catch ski poles and limit your field of view on steep chutes.
The bottom line is simple: never assume a mount fits based on the camera brand alone.
Measure, test, and check return policies, or you will be hiking back to the shop for a refund.
How Do I Prevent Fogging on Goggles While Wearing a Helmet?
Fogging happens because your helmet traps heat and moisture, turning the space around your face into a mini sauna.
That condensation is forming on the lens from the inside, not from snow or rain hitting the outside.
Before you even clip your boots into your bindings, crack every vent on your helmet wide open.
Your first move should always be to maximize airflow, so open the top vents, the brow vents, and any adjustable rear exhaust ports.
Next, stop pulling that neck gaiter or scarf up over your nose, because that funnels your warm breath straight onto the lens.
Instead, wear a slim balaclava that covers your chin and cheeks but leaves your mouth and nose fully exposed for upward airflow.
For the lens itself, apply a dedicated anti-fog wipe or treatment, like Gogglesoc’s anti-fog wipe at $12, before you head out.
Never use your glove or a dry cloth, because that smears oils and actually makes fogging worse.
If you’re still seeing mist after a few runs, pull the goggles off for thirty seconds mid-run and let the lens hit cold, dry air.
This quick reset works better than any spray, especially on humid days or during spring skiing when temperatures swing fast.
For those buying new gear, look for ski goggles with double-layered, thermal lenses and a helmet with a goggle clip system that creates a seamless seal.
Topical keywords like “fog-free ski goggles,” “best anti-fog treatment for goggles,” and “helmet venting for snowboarding” matter if you want this article to rank.
Remember that fogging worsens when you sweat, so keep your base layers light and breathable, and skip the heavyweight neck tube that soaks up moisture.
If you’re shopping for a helmet, prioritize models with at least 12 adjustable vents, like the Smith Vantage or Giro Ledge, because passive ventilation alone won’t cut it.
Buyer intent phrases like “buy fog-proof ski goggles” or “anti-fog inserts for snow goggles” should signal that you’re solving a real pain point, not just giving tips.
Your ultimate fix is a combination of pre-treatment, active venting, and immediate removal when mist appears, so never rely on a single trick.
For resort skiers, an anti-fog wipe in your jacket pocket is a $12 insurance policy that pays off on every chairlift ride.
Backcountry riders should consider lens swaps with a dedicated fog-resistant insert, but mainstream skiers get the most value from cleaning the lens with soap-free wipes each morning.
Here’s the bottom line: airflow beats sprays, every single time, and a properly vented helmet plus a snug goggle fit is your permanent solution.
Before you buy, search for “ski goggles that don’t fog” and read reviews from powder hounds who test in wet snow, then match your helmet vents to your local climate.
If your goggles still fog after all this, check for a cracked frame or worn foam, because damaged seals let cold air in and warm air out at the wrong spots.
Replace that gear with a model that has a spherical lens and a ventilation channel above the foam, which are proven specs for fog prevention.
Keep your goggles in a soft pouch overnight, never in a hot car, because heat degrades the anti-fog coating permanently.
And when you’re on the slopes, make opening your helmet vents a pre-flight ritual, just like checking your bindings, and you’ll see crystal-clear views from first chair to last run.
Can I Wash or Clean the Helmet Without Damaging the Camera Mount?
You’d think scrubbing a camera mount’s like defusing a bomb, but it’s not. Just don’t soak it, and you’ll keep your action cam rig intact.
Hand-wash the helmet shell with mild soap and warm water, avoiding direct jets on the mount’s adhesive or screws. This protects the bond that keeps your ski camera steady on bumpy runs.
Dry it with a microfiber cloth, never a dryer, because heat can warp the plastic shell and loosen the mount base. For the mount itself, wipe it with a damp cloth and a gentle cleaner that’s safe for polycarbonate.
Most ski helmet mounts handle humidity and snow melt fine, but harsh chemicals or pressure washers? That’s where you’ll lose the rig, especially if you’re filming park laps or backcountry kickers.
Bottom line: gentle hands, quick dry, and you’re set, no engineering degree needed, just common sense. If you’re shopping for a new helmet camera setup, check that the mount uses a replaceable adhesive plate, so cleaning never becomes a permanent decision.
For powder days, always brush off snow before it melts into the seams, and never submerge the helmet in a sink or bucket. A clean mount means stable footage on every carve, so treat it like your goggles, not your boots.
When in doubt, test the mount after cleaning with a gentle tug, then you’re ready to hit the slopes with confidence. That’s the smart purchase mindset, protect your gear, protect your POV.